
 Home (English)
 Français
In today's world, having a Facebook’s page may be very essential in your marketing strategy to promote your brand, product or blog and will definitely help you to get more followers on social media.
Having a good Facebook page’s name will help you to get in touch with people who already know or people who don’t know about your product.
In this blog we are going to see how we can change a Facebook page’s name on desktop in very easy and simple steps.
In order to change your Facebook page’s name, please follow the next five steps:
1 Log in to your Facebook’s account and go to your Facebook page.
2 Now you are on your Facebook page’s dashboard select the button “See more” from the list of the left side of the screen

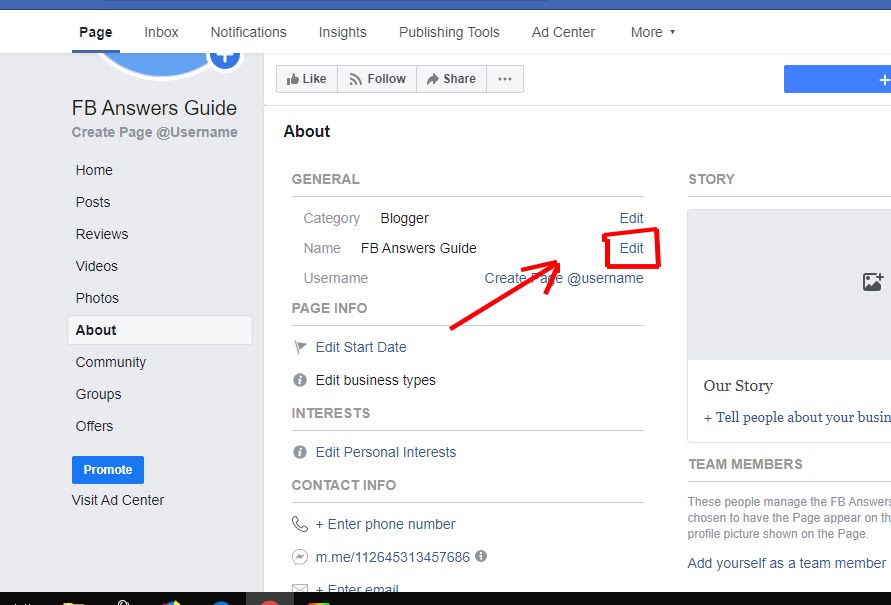
3 Now whole list has shown up, click on the button “About”

4 In the menu “General” and under “Category” click on the button “Edit” next to the “Name” section.
5 Now a new window page will show up, under the “Current Page name” click on “New Page name” in order to give your Facebook’s page a new name which helps to promote your business. In order to avoid problems, don’t use names of businesses or people who you don’t represent and make sure that your Facebook’s page name is authentic. In addition don’t use offending names because Facebook will not accept violating names. Finally you should not use the words “Facebook” or “official” in your new Facebook page’s name.

Your Facebook’s page name shouldn’t exceed 75 characters. Once you finish selecting the best name for your Facebook page, click on continue.
I hope this post has helped you to change your Facebook’s page on desktop.